Let me start by saying this project wasn't a pleased one. The tile install it self had beenn’t so bad—there had been just a number of tiny setbacks and frustrations that made this drag on for more than ten hours and use our patience slim. Renovation has its downs and ups… this is positively the lowest point.
Just need to ensure that it it is genuine once and sometime and enable you to men realize that this Do-it-yourself things is certainly not all sunlight and rainbows 🙂
Thereon note, let’s begin at the start!
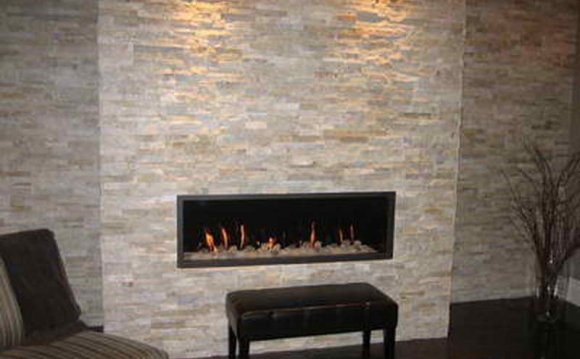
I pointed out somewhat during my subway tile post about wanting to utilize rock regarding the backsplash. That performedn’t occur, but I knew i possibly could at the very least incorporate it in to the club wall. I’ve always obsessed over stacked stone and today had been my opportunity to utilize it.
We bought 80 pieces but ended up using only 62 of them (+ we had a 10% off coupon), for a total of around $240.
Nevertheless the brackets wound up producing an issue. We couldn’t put in the shelves over the stone as it ended up being an irregular surface, and we couldn’t tile right within the brackets without notching them since they had a slight curve at the back. And you also can’t really notch quartz rock anyway simply because they don’t break off quickly like porcelain or ceramic tile.
And So I needed to produce an agenda B quick…. which’s when I spotted these unused desks from old studio…
They certainly weren’t suitable level, however the size was perfect, in addition they were lightweight. I could cause them to floating racks!
Initially I patched and sanded the little holes for which you attach the feet:
After that we torn all of them down to 11″ on the table saw. They've this paper/cardboard filler inside them that may be quickly pressed straight down…
It makes the right pocket to insert a cleat.
When it comes to cleats, we ripped down some free 2×4’s to 1.75″ by 1″ to fit snugly inside the shelf opening. Here’s the cleat entering the shelf from the left:
Since we had that component identified, it absolutely was time to begin tiling!
Originally we thought I would need a cement board backer, but I discovered the producer claims it’s only needed for walls 10′ tall or maybe more. Whew! Drywall it really is.
We utilized the same Type 1 mastic we had used for the backsplash tile (the man at Lowe’s said it will be fine). We just ensured to utilize far more to find yourself in most of the grooves and hold it (these tiles are hefty!) therefore we buttered the backs of each piece.
The pieces fit together very well…
Here’s something different we'd to deal with—this outlet. I really performedn’t want it breaking up a wall of tile. In hindsight we must have rewired it to the side of case before we setup the club however it had been too-late for the.
I have to provide credit to my dad—he developed pretty wizard answer: hide it behind a removable bit of stone, James Bond style.
To get this done, we very first must place a bit on it and locate it so we wouldn’t get mastic on that location.
Then we tiled around it as regular.
The trick stone had been done final therefore we’ll come back to it—back to your remaining wall.
We used exactly the same wet tile saw from our backsplash and it also worked great. It was somewhat trickier to go since there wasn’t an appartment surface to put up the tile down, so it had been tough to get straight cuts sometimes.
Both pieces regarding left had been notched from another tile to suit. The great thing concerning this material usually you will find unequal spaces every-where, so if you screw up only a little, it is no big deal!
A Few Of The gaps tend to be bigger than others, obviously, therefore get parts like this…
It-all combinations collectively whenever you step-back, but i possibly could always return in and increase coloured caulk.
After our second line was total, it was time for you start preparing out our very first shelf.
We marked the studs and drilled our very first cleat into them making use of 4″ decking screws (making certain it was 100per cent level—this part is vital!)
After that we slipped the rack over it and secured it from the top using screws every 8″ approximately.
For those of you who want to try out this yourself, it is worth nothing that this strategy won’t help a ton of body weight. We’re only making use of this for lightweight things therefore it will fit our requirements, but i mightn’t make use of it as a bookshelf or something.
Following The rack ended up being up, we tiled round the bottom…
Or over to the edge therefore we will have a level surface for the next row.
Additionally The tiling continued…
3 rows later on and it also was time for you to install our 2nd cleat. The first board we'd had been bowed a touch too much (it had been in fact a 2×4″ we saved from our kitchen demo, so it was nearly 50 yrs old and just a little worn down), so we needed to rip the shelf out and commence over.
The second time around worked out however.
Therefore had been about that time late on Saturday night that I started hating life and labeled as it quits.
I ought to in addition just take this minute to thank my hubby for suffering most of these tasks I throw at him, specially lately. Renovation is certainly not their passion or pastime, it’s mine, and he’d much rather be doing something else every weekend (and a lot of evenings). But he constantly agrees to help myself and goes along side whatever brand new program we toss at him (I think after three homes he’s eventually trusting my vision!) So Brad, thank you, seriously, for every thing
Share this Post
latest posts
-
 Natural stone Tile Seattle February 27, 2025
 -
 Natural stone tiles Dublin January 28, 2025
 -
 Stone tiles for kitchen floors December 29, 2024
 -
 Stone floor tiles Norwich November 29, 2024
 -
 Install stone tile on drywall October 30, 2024
 -
 Crystal Stone Coffee Mosaic Tile September 30, 2024
 -
 Stone Mosaic Tile Company August 31, 2024
 -
 Stone Tile wall cladding August 1, 2024
 -
 Installing Travertine subway tile backsplash July 2, 2024
 -
 Adhesive for stone wall tiles June 2, 2024