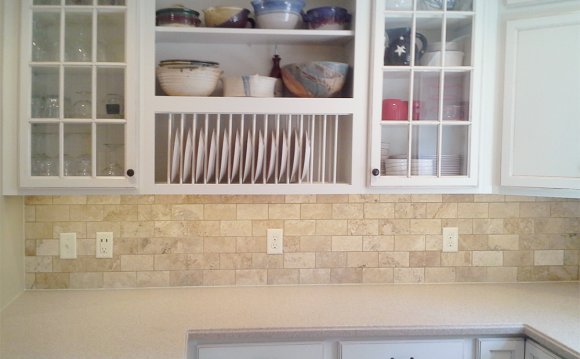
a rock backsplash around your countertop can not only make your wall surface more appealing but additionally protect it from harm caused by liquid or grease spatters.
Installing a stone-tile backsplash calls for intermediate-level skills and takes approx 2 days for just two men and women. The price of the project is usually about $200 for a medium-sized home.
Note: Stone tiles are usually relatively large and need spacers to help ensure right grout outlines.
Damp saw
Diamond-blade material grinder
Notched trowel
Grout float
Rock tiles
1/4" spacers
Mastic glue
Drill with mixing attachment
Grout
Level
Safety glasses
1. Make sure the backsplash in your countertop is amount. Then put a tile from the wall surface in addition to the enclosure, level the wall surface towards the top of the tile, and draw an amount research range across the whole location to be tiled. If the enclosure just isn't degree, base your guide range on a tile placed at the lowest point associated with the top of the enclosure.
In the event that countertop backsplash isn't amount, you'll want to utilize the research line as a kick off point to help you keep consitently the tiles arranged. You may want to align the top a board with all the reference line and connect it into the wall surface for added support whenever you apply the tiles. Following the tiles come in spot, take away the board, slice the tiles to size, and install them over the the surface of the backsplash.
If you're installing huge tiles that may fill the room between the backsplash and top cabinets, you don't have to concern yourself with the backsplash becoming level.
2. Place and level the middle point of every area to be tiled.
3. Make a "dry run, " lining-up the edge of one tile using center level after which "leap frogging" tile pieces hand and hand to determine how many pieces will undoubtedly be needed and what the conclusion pieces will appear like. If the end pieces will be very tiny, repeat the dried out run, centering initial tile from the center level. This will allow you to reduce bigger and much more appealing part pieces.
If an individual side of tile work have exposed sides, use whole tiles close to the advantage and reduce just the tiles that will be near the wall surface.
4. Scoop out a big dollop of mastic adhesive using notched trowel and spread it in the wall surface, starting at the center level. Distribute the mastic to the reference range. After that distribute the mastic horizontally. Hold the trowel at a 45-degree direction when distributing mastic. The trowel's notches assist make sure a level distribution regarding the adhesive. Scatter just the maximum amount of glue as you can tile in ten minutes.
5. Beginning at the center level, set the tiles solidly positioned in a straight row, making sure the spacers come in destination. Do not set corner pieces in place yet unless no cutting is needed.
6. Trim tiles as required to accommodate electrical outlets. Assess the place associated with socket, and transfer the dimension to the tile. Use a wet saw or a diamond -blade steel grinder to cut fully out the openings for accessories. Begin cutting the tile from the front side, but do not reduce right to the spot.
7. Turn the tile over, and finish eliminating the corners through the straight back regarding the tile. Always wear protection cups whenever cutting tile.
8. After the first line is complete, begin the 2nd. Continue doing this procedure through to the tiles have reached the required height. Periodically check your work to make sure the rows tend to be degree.
9. Reduce part tiles to size with a wet saw. Set place pieces set up with the cut sides dealing with the corners. This can cause them to become more difficult to detect as soon as the task is completed.
After the tile has actually set, start applying grout. Use unsanded grout for small grout lines and glazed tiles. Grout will come in numerous colors. For a seamless appearance, choose one that suits the tile.
1. Mix the grout to your consistency of peanut butter. You need to use a mixing attachment on a variable-speed drill set at reduced rate.
2. In the event the rock tiles absorb dampness rapidly, damp them before you apply grout so they really won't absorb moisture through the grout too quickly.
3. Apply the grout with a plastic grout float. If there's lots of room between grout lines, it is possible to focus on each line independently.
4. Let the grout setting for around 10 minutes, after that wipe-off the surplus. Wipe at a 45-degree angle in order to avoid eliminating an excessive amount of grout from grout range.
Share this Post
latest posts
-
 Natural stone Tile Seattle February 27, 2025
 -
 Natural stone tiles Dublin January 28, 2025
 -
 Stone tiles for kitchen floors December 29, 2024
 -
 Stone floor tiles Norwich November 29, 2024
 -
 Install stone tile on drywall October 30, 2024
 -
 Crystal Stone Coffee Mosaic Tile September 30, 2024
 -
 Stone Mosaic Tile Company August 31, 2024
 -
 Stone Tile wall cladding August 1, 2024
 -
 Installing Travertine subway tile backsplash July 2, 2024
 -
 Adhesive for stone wall tiles June 2, 2024