 Gathering the equipment and materials beforehand whilst getting a solid breakdown of the task reduces hassle and assists ensure an excellent task when you get started. This is an excellent guideline, both when considering tips put in a backsplash, or practically any do it yourself job. The old adage of "measure twice, slashed when" is great advice.
Understanding that, right here’s what you’ll should effectively complete a tile backsplash installation.
Tools for backsplash set up:
- Tape measure
- Amount
- Straight edge
- Notched trowel
- Tile float
- 5-gal. bucket & sponge
- Tile cutter
- Utility knife
- Power exercise
- Mixing paddle
Materials for backsplash installation
- Mortar (ask the retailer which mortar is suitable for the tile you decide on)
- Sealer
- Grout (choose an item developed for form of tile you are installing)
- Tile adhesive
Tips to Successful Tile Backsplash Installation
Here you will find the steps needed for Do-it-yourself backsplash installation that looks like an expert made it happen. It may assist to examine all the actions before beginning run the project.
The 1st step: Measure to Determine Just How Much Tile is required
You’re looking square video footage right here. While you measure, divide the wall surface up into rectangles, and measure height and width and multiply. Add all of the rectangle sums together. Next, include ten to fifteen percent additional to account fully for mistakes or tiny gaps you overlooked. The excess in addition provides additional tiles for spares in the event tiles or sections tend to be damaged in the future.
Step Two: Ready the Area You’ll Feel Working In
a chaotic area decreases the job and creates the possibility for mistakes. Clear off all of the countertops, remove light switch and socket covers, unplug the product range and move it out of means.
Next, cover the countertops with protective materials eg cardboard or a heavy tarp. Use tape to safeguard cabinets, countertops, current backsplash, etc. just like you'll if you were getting ready to decorate the top instead of tile it.
Finally, turn off electrical circuits into the light switches and outlets you’ll be working around in order to avoid the possibility of having shocked. Safety and health first!
Third step: Prepare the Wall for Backsplash Installation
Wall prep is vital. The wall surface area needs to be without damage, therefore patch holes and fill nicks, deep scratches and indents with spackle. Sand repair works softly. Imperfections when you look at the wall surface can arrive later by simply making tile irregular, therefore take some time necessary to understand this step appropriate. Below are a few even more helpful hints for wall preparation:
- Gloss and semi-gloss surfaces need to be sanded
- Less shiny surfaces should be scrubbed gently with tri-sodium phosphate option (see label for instructions)
- All walls must certanly be without any dirt, oil and sanding dirt, therefore wash them with moderate detergent and wash completely with water
- Really greasy walls, possibly behind the number, must certanly be degreased or primed with something built to cover stains and oil
- Enable walls to dried out before installing tile
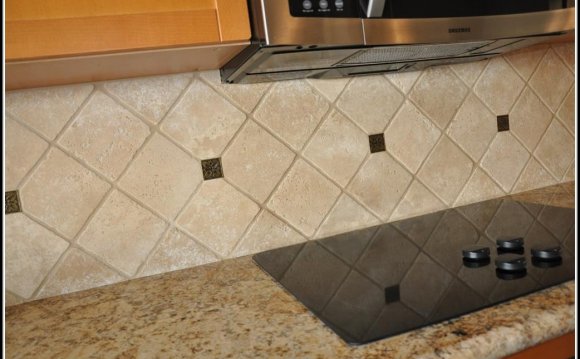
Fourth step: Pre-fit the Tile
Find the many visible location to-be covered – the focus. Normally the biggest part of wall surface becoming covered. These pointers helps with this action:
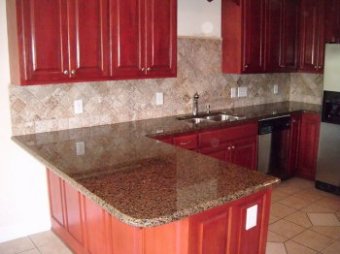
- The area behind the range or behind the sink is normally the kitchen’s focal point
- In your bathrooms or laundry area, the focal point is usually within the sink or higher considerable devices or fixtures
- Start on low point, in the middle of the primary focal area
- Utilize spacers to have correct spacing of tile
- Cut tiles or tile sheets in which essential to fit corners
- A tile cutter is perfect for straight cuts, a nip works for rounding tiles and a wet saw is important for all-natural rock tile
- A software application blade is the best way to cut the mesh keeping tiles in a sheet of tiles
- Whenever installing single tiles, mix up tiles from a few boxes to generate a far better blend, regardless of if all of the tiles are exactly the same shade
- Gaps of not as much as one-inch where the wall surface fulfills the cabinets or ceiling could be filled with cut tile or covered with trim
- Put the tiles regarding countertop for putting in later
Action Five: Mix the Mortar
You’ve got pre-mixed and powder choices. Pre-mixed tile mortar is a great option for light, little tiles. For heavier tile, a powdered thinset mortar will hold much more firmly.
Stick to the instructions in the bundle for blending powder thinset. an exercise and mixing paddle is likely to make the work go quicker and more carefully mix the mortar.
Step Six: Employ Mortar on Wall
Keeping the notched trowel at a 45-degree perspective, use a slim layer of thinset with the flat region of the trowel to pay for the top totally. Cover a part about three feet square if working with tile sheets or two feet square if dealing with individual tiles to stop the mortar from blow drying before tile is installed. Begin with a straight smaller area if installing tiles under four ins square.
Next, apply an additional layer of thinset using the notched part. Comb through thinset side to side with all the notched trowel generate ridges.
Action Seven: Install the Tile
These pointers for wall surface tile installation will help ensure your success on this task:
- Whether making use of solitary tiles or mosaic sheets, put in 1st tile or section in the middle of the key focal location using a level making it straight, if needed
- Somewhat rotate the piece while pressing it straight down in order to flatten the combed ridges of thinset, and use spacers to allow the correct level of area between tiles for the grout
- Utilize this method – including mortar to small places and setting tile – to set up tile over the entire area becoming covered by the backsplash
- Pull thinset from surface of every tile before it hardens
- Make use of the tile float to gently hit the tile to the mortar
- As soon as all the tiles tend to be installed, allow the mortar to dry totally, a process which generally takes at least eight hours and should be total within 24 hours
- If the mortar is dried out, wipe the tiles with a cloth dampened with heated water
Note: If installing natural rock tile, the tile should be sealed before grouting to be able to protect it from becoming stained by the grout
Action Eight: Mix the Grout
Very carefully follow directions regarding the package. Ideal strategy will be include water on container first and then pour the powder. This helps prevent the grout from clumping on the edges associated with container. Most grout must be permitted to are a symbol of five to ten minutes after mixing. Once you begin adding grout to your tile, the grout is mixed every 15 to 20 minutes to keep persistence.
Pre-mixed grout can be offered. Talk to your tile store for the best product for the project.
Note: You’ll have actually about two hours to utilize the prepared grout, therefore mix a comparatively tiny batch the first time.
Share this Post
latest posts
-
 Natural stone Tile Seattle February 27, 2025
 -
 Natural stone tiles Dublin January 28, 2025
 -
 Stone tiles for kitchen floors December 29, 2024
 -
 Stone floor tiles Norwich November 29, 2024
 -
 Install stone tile on drywall October 30, 2024
 -
 Crystal Stone Coffee Mosaic Tile September 30, 2024
 -
 Stone Mosaic Tile Company August 31, 2024
 -
 Stone Tile wall cladding August 1, 2024
 -
 Installing Travertine subway tile backsplash July 2, 2024
 -
 Adhesive for stone wall tiles June 2, 2024