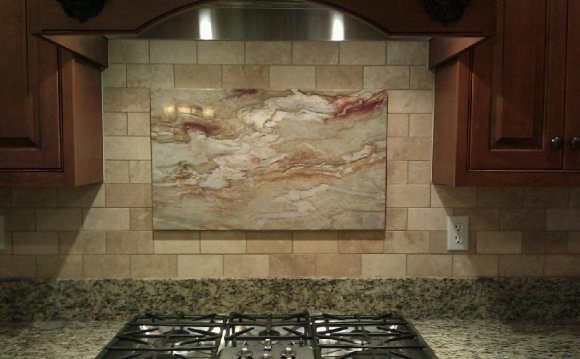
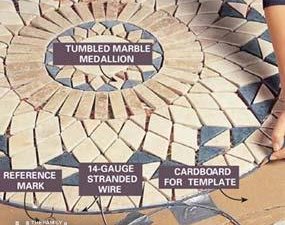
Establishing the medallion
Medallions come preassembled (halves) so what you need to do is carefully slide them in.
One understand this tumbled marble medallion and we also were hooked—especially when the salesperson told us the whole medallion emerged preassembled on a backer pad. All we'd have to do is put in a mortar base while the floor tile, leaving a place when it comes to round medallion, and drop both halves in position.
In this essay, we'll explain to you tips tile a flooring that features a focused medallion. The local full-service tile showroom could have a medallion on display for you to consider, but the majority medallions must be ordered. Our marble medallion took one month to arrive.
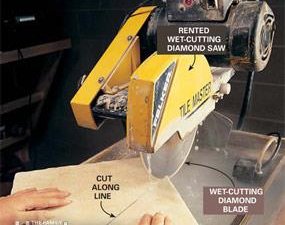
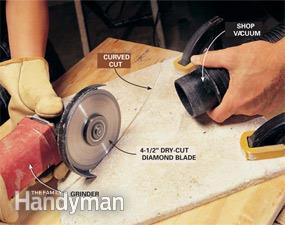
The 12 x 12-in. tumbled limestone tiles that surround the medallion were pricey. Order about 20 percent extra to permit waste when it comes to diagonal slices. You might like to use among the numerous other floor tiles that look like stone (and are usually less costly!). Just be sure whatever floor tile you choose is approximately similar depth due to the fact medallion.
Although the medallion is preassembled, you ought to have some tiling experience. Anticipate investing a couple of weekends to complete a project such as this.
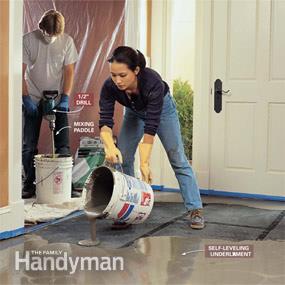
Picture 4: Pour leveling underlayment
Pour the self-leveling mortar underlayment round the border. Then quickly fill out the guts, working toward your combining area. Have actually a helper carry on the mixing procedure. Make use of a trowel to simply help the mortar into corners and around obstacles. Work rapidly. Reach out and spread the mortar with a trowel as you work the right path out of the area. After that leave it alone as it amounts away and hardens.
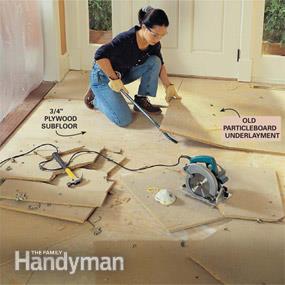
The next step for a durable tile flooring is use a stronger, amount, tile-setting base. In the old days, there was no choice of base material. It had been always a thick (1 to 4 in.) level of mortar that needed a talented craftsman to install. Then arrived 3 x 5-ft. sheets of 1/2-in. dense concrete board; they were simpler to put in yet still perhaps not perfect. The boards stick to the contour of the floor, which does nothing to correct crooked or out-of-level flooring.
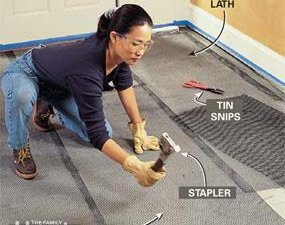
 rather we used a relatively new type of tile base called self-leveling underlayment. It's basically mortar with exudate additives therefore combine it with liquid. It can be confusing soupy enough to pour from a bucket but is extra strong when it hardens. You do not need any unique ability to put a perfectly smooth and level flooring, and also you don’t need to fool around with cutting concrete board. You’ll find 25-lb. bags of self-leveling underlayment dust at full-service tile shops and a lot of large home centers. The company reveals the very least width of 3/8 in., but becoming safe we poured our underlayment 1/2 in. deep. For 1/2-in. depth, you will need one case for each 12 sq. ft. of flooring. You'll also need primer to seal the wood subfloor (check out the underlayment bag for the specific kind) and extended steel lath to reinforce the mortar. Sheets of material lath are often 30 x 84 in. and generally are readily available for which you purchase your other tile materials. Buy adequate to cover the entire flooring, plus about 10 percent additional to accommodate waste.
 Photos 1 - 4 tv show just how to prepare the ground and pour the mortar underlayment. Mixing and pouring the self-leveling underlayment can be as simple it looks, but there are some things to be cautious about.
The self-leveling underlayment we used starts to solidify in about ten full minutes at 70 levels F, and even quicker if it is hotter. (Some products are created to provide you with a tad bit more time; look at the case to find out.) The secret to success is having every thing all set to go. Before you start combining, gauge the specific number of liquid into five or six 5-gal. buckets, open all of the bags you'll need, and also extra water therefore the calculating bucket handy. Then have actually a helper mix although you pour. The both of you should be able to blend and put a bag every min; that is plenty of time unless you have actually a very big floor.
Clean the tools and buckets right-away. Then allow underlayment harden instantly before you decide to tile. Tip: For a significantly better gauge of depth, use a 4-ft. level to set up a grid of drywall screws using minds level aided by the desired top surface. Then afin de the mud despite the top of the screws and remove all of them after it hardens.
If you return your day after pouring to find some low places into the floor, do not panic. We had this problem and fixed it by priming the underlayment and pouring another 1/8-in. layer to fill the low places.
Share this Post
latest posts
-
 Natural stone Tile Seattle February 27, 2025
 -
 Natural stone tiles Dublin January 28, 2025
 -
 Stone tiles for kitchen floors December 29, 2024
 -
 Stone floor tiles Norwich November 29, 2024
 -
 Install stone tile on drywall October 30, 2024
 -
 Crystal Stone Coffee Mosaic Tile September 30, 2024
 -
 Stone Mosaic Tile Company August 31, 2024
 -
 Stone Tile wall cladding August 1, 2024
 -
 Installing Travertine subway tile backsplash July 2, 2024
 -
 Adhesive for stone wall tiles June 2, 2024