 Laminate offers you the good thing about real lumber with no upkeep or cost.
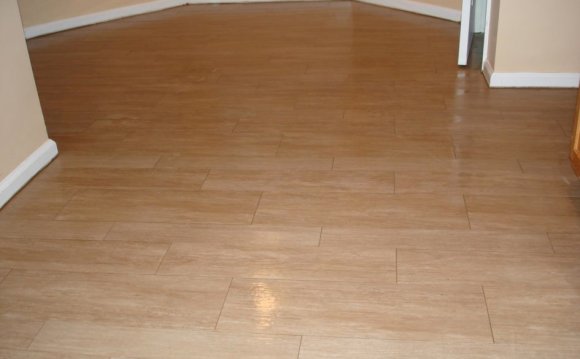
Over the past handful of decades, some sort of laminate flooring industry has spotted massive growth and product improvement. Manufactured to look like genuine timber, tile or any other products, laminate flooring is composed of levels of products bonded under heat and intense stress. Today’s laminate wood flooring choices appear to be solid wood but they’re easier to install, and you may put them right over current floor coverings product, including tile.
Current Tile Floor
While tile is usually high-end flooring, it is a hassle to tear aside, which makes it a great applicant for resurfacing with laminate floor coverings. If the tiles are fairly level and safe, the only real prep important is the elimination of the beds base around the flooring border and sweeping a floor clean. Any tiles that stick up above 1/16 inches above the surrounding tiles is chipped on with a hammer and chisel therefore the void filled and leveled with thinset. Level discrepancies of less than 1/16 inch should not impact the new floor.
Laminate Cushioning
Laminate lumber floors comes in glue-down and drifting snap-lock varieties. Both install similarly, but not all glue-down types are suitable to put in over tiles - so read the manufacturer’s specifications before choosing. Overall, laminate flooring needs a base of slim polyethylene foam cushioning. This will come in large rolls that install right on the tile. For convenience, some companies include foam already connected to the straight back associated with planks.
Installation Concepts
To discover the best results, start laying the laminate over the longest wall when you look at the room. Each plank has tongue-and-groove edges and ends. The finishes of this planks fit together when you tap all of them, together with edges for the planks snap collectively by inserting the tongued edged of just one plank into the grooved side of another at a 45-degree direction and pressing the plank flat to break it into spot. The stops regarding the planks should stagger to help keep the end seams from lining up, which creates weak spots inside floor. The best way to stagger the seams would be to begin a line of laminate utilizing the excess piece slashed through the end for the former line. Use 1/4-inch spacers to keep the sides associated with the floor coverings from pressing the walls.
Cutting and Fitting Laminate
If you’re planning to put in the laminate floors in anything apart from a square or rectangular area, odds are you will need to cut around cupboards and door structures. Measure and cut the planks while you put all of them. Make complicated slices with a jigsaw. For cutting a plank lengthwise, known as “ripping, ” use a circular saw or a table saw. Laminate is around 1/4- to 1/3-inch thick, therefore it will sit more than door casings. For an expert appearance, utilize a jamb-saw to cut away the base of the casing and slip the laminate plank beneath. Browse and proceed with the manufacturer’s protection instructions when making use of power tools.
Share this Post
latest posts
-
 Natural stone Tile Seattle February 27, 2025
 -
 Natural stone tiles Dublin January 28, 2025
 -
 Stone tiles for kitchen floors December 29, 2024
 -
 Stone floor tiles Norwich November 29, 2024
 -
 Install stone tile on drywall October 30, 2024
 -
 Crystal Stone Coffee Mosaic Tile September 30, 2024
 -
 Stone Mosaic Tile Company August 31, 2024
 -
 Stone Tile wall cladding August 1, 2024
 -
 Installing Travertine subway tile backsplash July 2, 2024
 -
 Adhesive for stone wall tiles June 2, 2024